
Sitemaps: Frequently Asked Questions

What is a sitemap?
Sitemap is a file in the domain’s home directory. This file contains a unified list of URLs that you would like to be indexed. It makes your website easier to crawl by search engines like google, bing. It can facilitate your chances of ranking higher & also makes your site be crawled properly, quickly and more efficiently. sitemaps make navigating your website much simpler. In fact, it is necessary to have an up to date site map for SERPs.
Does my website need a site map?
Yes. In simple terms, A site map assists search engines like google, Bing very easily understands your website’s framework while becoming crawled. And if your site has a complicated framework or your site is new or has been adding dynamic webpages, a site map will significantly improve your rating. Further, you’ll have a set of all URLs from your website and you obtain crawl priority. Also, it really is an essential facet of SEO.
Why is a site map important?
Site map is essential for SEO because they help to make it less difficult for search engines like Google, Bing. The site map is essential to find your website’s pages. Because Google ranks webpages not simply websites. There is absolutely no downside of experiencing an XML Sitemap and having it can improve your website SEO. Therefore it is recommended them to use for SEO.
Is the XML site map required?
An excellent XML site map acts as a roadmap of your website. It leads Google to all of your important pages. The XML site map is great for the website’s SEO. Because they enable Google to quickly discover your essential webpages, even if your internal linking isn’t so perfect.
Is the HTML sitemap required?
Yes, the HTML site map is a quite useful resource for your website. It is useful for human visitors. Since it enables them to discover your website pages inside your website very quickly. Further, HTML site maps represent an extremely efficient method to distribute your hyperlink juice among the web pages of your website.
Where do I put the website’s site map?
It is strongly recommended that you place your website’s site map in the main directory of your HTML server (aka domain’s home directory). Example site map is here
Do I have to submit the site map to Google?
Submitting a site map to google has the following advantages. A site map is a vital resource used for SEO. SEO helps to rank your website in a higher position. That will attract traffic and income to the website. Further, they are important for search engines. so that they crawl and index the web site & helps to get a better position in SERP results.
Do I have to update my site map?
Yes, It is smart to upgrade the site map if you have brand-new webpages. And in addition, when you update your content in a post, it is recommended to re-submit your site map. When you switch the framework of your website, change or simply update your articles or type of content or involve some new content showing, it is advisable to update your website’s site map.
How to create a Site map?
Either manually create site map XML file or use an online site map generator tool. The site map.xml file can be manually made up of your website structure. And then submit the site map.xml file.
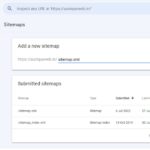
How do you submit a site map?
To submit a site map file, simply login to Google Search Console aka Google Webmaster Tools. Click on index & select Sitemaps. In Add Site map, enter the URL & click on submit. Google will start testing the site map file immediately. Once it is done without error, it will be reported in submitted sitemaps, else it reports errors in the site map.
Should a Site map become indexed?
Preferably, you want the number of pages indexed to be exactly like the number of pages submitted. Remember that submitting your site map tells Google which webpages you take into account to be top quality and worth indexation, but it will not guarantee that they can be indexed.
What’s a priority in Site map?
The <priority> tag can be used in the XML site map, by the webmaster, to signal the need for individual pages in the web site to Google and other search engines. Priority levels are relative to your website.
How do site map errors influence your ranking?
Site map errors may include the following, compression error, empty site map, HTTP error, or incorrect namespace. These errors can “filthy up” your site map, producing your site harder to crawl. If specific pages can’t be crawled properly, they can’t be indexed. If your webpages aren’t indexed, you won’t get a favorable rating in Google and overlook plenty of organic traffic.
What’s a site map in Google Search Console?
An XML site map is a file where one can list URLs that define your web site in order that engines like google know about the business of your site structure and content. It is recommended you to inform Google of your site map via the Google Search console. Please enter the entire Https/HTTP address for your site map. example site map
What’s XML Site map Validator?
XML Site map Validator is a tool & will check if your XML site map is formatted properly and optionally ping Google to check your site map area. In other terms, XML site map validator will let you know immediately if there are any issues with your site map. So it enabling you to make adjustments just before submitting it to the search engines like Google, Bing, etc.
Can i validate an XML site map against an XML schema?
Yes. You may use the schema found at sitemap.xsd for site map. Also, siteindex.xsd may be used for site map index files.
Why Site map?
Similar to the name implies a site map maps away your website. It is an individual web page outlining your website’s framework, including sections and links.
Does Google Search Console accept HTML Site map files?
No, Google will not accept submitting an HTML site map in Google Webmaster Tools.

XML Sitemaps
An excellent XML sitemap is very much indeed important from the SEO perspective. It is essentially a roadmap to all or any of the webpages on your website. XML sitemap makes it less difficult for Google, to crawl every single web page and index it correctly, to improve its ranking. Therefore, creating it really is very simple & is very important to the better and improved rating of your website.
In case you are a novice and wish to know more about any of it, this content is for you personally. Scroll down and dig into the deep information linked to create and optimize it.
As you already may know that Google supports the following sitemap formats:
- XML Sitemap
- RSS, mRSS, & Atom 1.0
- Text Sitemap / HTML Sitemap
As like XML Sitemap, HTML sitemap is also very popular & its list out all important pages of your website. HTML Sitemap will be in well-organized table of content.
Use Plugins To Create Sitemap Automatically
The initial and foremost point you have to do is create sitemap using plugins for Google. It’s an instrument that is made to make your projects easier than before, therefore, you should spend your time and effort into this, to reap all its benefits.
Sitemap Validator/Sitemap Checker
Sitemap Validator/Sitemap Checker is a tool to validate sitemap of website according to the standards prescribed. It also checks whether it is formatted correctly. Optionally it may also ping google & to inform of your sitemap location.
Sitemap Checker also inform you of any issues in your sitemap & likely to allow you to make changes prior to submitting it to Google.
Submit It To Google
Once you produce it, now you have to post it to the internet search engine to Google search gaming console. It’ll assist you to discover if any mistake, so, you can right it timely and resubmit it for the indexing of all important web pages on your website.
Arranged Your Priority List
While creating the it, every web page should provide priority, as every web page on the site is essential. And being truly a marketer, you need ranking from all of the pages to obtain the better outcomes from your efforts. This might help Google crawl your total website for higher ranking.
Consist of Only Direct URLs
In case you have multiple webpages for an identical keyword, so, rather than confusing the various search engines, you should submit just the accepted edition of URLs. It’ll cut the various search engines confusion and make it much easier to allow them to index your unique page that additional plays a vital part in boosting its position.
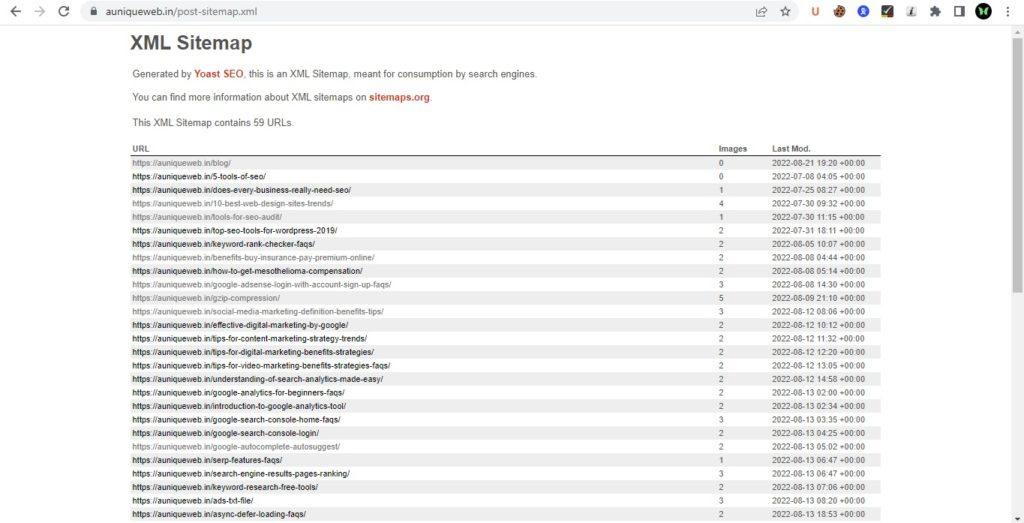 XML Sitemap Of AUniqueWeb
Keep Your XML Document Small
If how big is your sitemap is usually large, so, it could put an excellent strain on your own server, which impacts its loading period and affect user-experience simultaneously. Therefore, it is usually great to submit as little size as easy for indexing.
How to submit the sitemap to the google webmaster tools?
The Steps to follow to submit to the Google Search Console are
1. First click on Google Search Console
2. Login to Google Search Console
3. Click on “sitemaps” of Index.
4. provide a sitemap path except for domain name
5. Click on the submit button & it will submit the it to google.
5 Sitemap Types for SEOs
Sitemap is a list of pages on a website that shows how visitors navigate through the site. It helps search engines understand which pages are most important for users to see. There are five types of sitemaps that you should know about if you’re an SEO.
XML Sitemap
An XML sitemap is a file format used by webmasters to describe the structure of a website’s navigation hierarchy. This file contains links to each page on the site, along with its URL. Search engine crawlers use these files to index the pages on a website.
An HTML sitemap is a text document that lists URLs for every page on a website. These documents are usually generated automatically by web servers when new pages are added to a website. They are not indexed by search engines.
HTML Sitemap
A Google Webmaster Tools sitemap allows you to submit URLs for crawling and indexing. You can also add custom parameters to the URLs so that Googlebot will understand what those URLs do.
A Google Analytics sitemap shows how users navigate through your site. It includes the URLs of pages visited by users as well as the referring sites.
RSS Feed Sitemap
An XML file that contains links to webpages within your website. This type of sitemap is used by search engines to crawl your site.
An HTML sitemap is a list of links to other pages on your site. Search engines use these files to find new pages on your site.
JSON Sitemap
A Google Webmaster Tools sitemap is a simple text file that lists URLs for each page on your site. It’s also called a “Google Sitemap.” You can add this file to your Google Webmaster Tools account to help Google index your site more quickly.
A robots.txt file tells search engine spiders what pages to ignore when crawling your site.
Image Sitemap
An XML sitemap is a list of links to every URL on your website. This helps search engines crawl your site faster by letting them know where to find certain pages.
An HTML sitemap is a plain-text document that lists links to every page on your site.
5 Ways to Build Your Own Website Sitemap Using Google Sites
Sitemaps tell search engines where pages on your website are located. They also provide information for users that helps them navigate your site.You can build your own sitemap using Google Sites. It’s easy to create a sitemap from scratch or import one from another site.
Create a new Site Map.
To start building your own sitemap, click “New Site Map” at the top right corner of the screen. Then enter the URL of the page you want to add to the sitemap. Next, select the type of sitemap you want to use (either XML or HTML). Finally, choose whether you want to allow robots to crawl your site.
Add pages to it.
Once you’ve finished creating your sitemap, you can add pages to it by clicking the + button next to the “Pages” section. Click the “Add Page” link under the “Sitemaps” heading. Enter the name of the page you want added to the sitemap and then click “Save.”
Edit the XML file.
To edit the XML file, click the “Edit” tab at the top of the screen. Then, select the XML file you want to edit. Next, click the “XML” tab. Finally, make any changes you need to the XML file.
Publish it.
Once you’ve made your edits, publish the sitemap by clicking the “Publish” button. This will generate an HTML version of the sitemap. Copy the URL of the HTML file and paste it into your website’s robots.txt file.
Test it!
If you’re not sure whether your sitemap works correctly, test it out with a few different search engines. Try searching for your main keywords and see how well your sitemap ranks.
Why Websites Need Sitemaps
A sitemap is an XML file that lists out all of the pages on your website. It helps Google crawl through your site more efficiently. A sitemap tells search engines which pages are most important for users to see when they visit your site. This lets Google index those pages faster and better.
Create a Sitemap File.
If you haven’t done so yet, create a sitemap file for your website. You can do this by going to Google Webmaster Tools > Crawl > Manage URLs. Then click “Create New Sitemap” and follow the instructions.
Add it to your Website.
Once you’ve created your sitemap, add it to your website using HTML code. This will help Google index your new pages more quickly.
Submit it to Search Engines.
You should submit your sitemap to search engines such as Google, Bing, Yahoo, and Yandex. If you do not submit your sitemap, then these search engines won’t be able to find your pages.
Create a sitemap using Google Webmaster Tools.
To create a sitemap, go to Google Webmaster Tools and click “Sitemaps” under “Crawl.” Then, select “Create new sitemap.” This will generate a sitemap with links to each page on your site.
Submit it to Google Search Console.
Once you submit your sitemap, Google will index it and begin crawling your site. You should see a message pop up saying that Google has started crawling your site. If not, check back later.
The Benefits of Having a Sitemap
The sitemap is an essential part of any website. It helps users navigate through your site and provides information on how to reach different pages. In this article, we’ll explain why building a sitemap is important and what benefits it has for your business.
Why You Need a Sitemap
A sitemap is a list of every page on your site. This includes both static and dynamic pages. If you use WordPress as your CMS (content management system), then you can easily add a sitemap to your site by going into Settings > Reading and adding a new one.
What Is a Sitemap?
A sitemap helps search engines understand how your website works so they can index it more effectively. It also makes it easier for users to navigate your site.
How to Create a Sitemap
If you haven’t already done so, now is a good time to start creating a sitemap for your website. You should do this before you launch any new pages on your site. This will help search engines better understand how your site works and make it easier for visitors to find what they need.
How to Implement a Sitemap
A sitemap is an XML file that lists out every URL on your site. It helps search engines understand how your site works by providing them with a list of URLs that link to each other. Search engines use these links to determine where to place your site within its results.
How to Manage Your Sitemaps
If you’re not familiar with sitemaps, here’s a quick overview of how they work. You should build one for each website you own or manage. This includes any subdomains (like www.example.com) as well as mobile sites (m.example.com).
5 Things You Must Include In your Sitemap
A sitemap is an essential tool for optimizing your website. It helps Google crawl your site more efficiently. A sitemap is a list of all the pages on your site that Google needs to index in order to properly understand your content. This includes images, videos, and other media.
Here’s how to create one.
If you haven’t yet created a sitemap for your site, here’s what you need to do. First, make sure you’ve included all the URLs for each page on your site. Then, use a free online generator to create a sitemap. Once you’re done, upload the file to your server and submit it to Google Webmaster Tools.
Create a sitemap.xml file.
To create a sitemap, follow these steps: 1) Go to www.google.com/webmasters 2) Click “Sitemaps” 3) Enter your URL 4) Select “Create new sitemap” 5) Upload your sitemap.xml 6) Submit your sitemap.
Add it to your root directory.
Once you’ve uploaded your sitemap, make sure it’s added to your root directory (the top level folder). This will ensure that Google crawls your entire site. If you’re using WordPress, there should be a file called.htaccess in your root directory. Open it up and add the following line at the end of the file: RewriteEngine On RewriteBase / RewriteRule ^sitemap\.xml$ – .
Name it “sitemap.xml” or something similar.
Make sure to name your sitemap file with the.xml extension. Also, make sure to place it in the root directory of your site.
Include links to each page.
To help Google index your pages, you should include links to each page on your site. This will allow Google to crawl your site more effectively.
Types of Sitemaps
There are two types of sitemaps: HTML and RSS. Which one should you create? Read this article to find out!
Sitemaps are used by search engines to determine which pages on your site are most important for users to see. They’re also useful for other purposes, such as helping people navigate through your website.
HTML vs. RSS
An HTML sitemap is an XML file that lists URLs for each page on your site. It’s usually included in the section of your webpages. You can use Google Webmaster Tools to generate an HTML sitemap.
An RSS sitemap is a list of links to different pages on your site. It looks similar to an email newsletter, with each link representing a webpage. You can add an RSS sitemap to your site using Feedburner.
Why You Need Both
If you’re creating both an HTML and an RSS sitemap, you’ll need to decide whether you want to publish them separately or together. A separate sitemap will allow search engines to crawl your entire website, while a combined sitemap will only show up when users click through to your RSS feed.
The Pros & Cons of Each
HTML sitemaps are easier to create than RSS sitemaps because they require less coding. However, they won’t work with mobile devices, so they aren’t as user friendly. On the other hand, RSS sitemaps are more difficult to create, but they do work well with mobile devices.
When to Create Them
You should create an HTML sitemap when you first launch your website. This will help Google understand what pages are available on your site. It’s also helpful to create an XML sitemap when you add new pages to your site.
How to Build One
An HTML sitemap is a list of URLs that point to each page on your site. Each URL has a title and description that helps search engines understand what the page is about. A good sitemap includes links to every page on your site, so that users can easily navigate through them.
8 Essential Elements of a Good Site Map
We’ve compiled a list of 10 essential elements of a good sitemap. A sitemap is an important tool for any website owner. It helps visitors navigate through your site and provides information on how to contact you.
Include a Sitemap.xml file.
If you’re using WordPress as your CMS, there’s no need to add a separate sitemap.xml file. Simply go to Settings > Reading and click “Add New” under the Sitemaps section. You’ll see a box where you can enter the URL of your sitemap.
Include a Robots.txt file.
A robots.txt file tells search engines not to index certain pages. It also helps prevent duplicate content issues by preventing search engine crawlers from crawling the same URLs multiple times.
Include a tag for each page.
You should use a link tag to point to every page on your site. This will help Google understand what each page is about. If you have a lot of pages, you might consider using a subdomain instead of creating individual pages.
Include atag.
A sitemap is an XML file that lists out all the pages on your website. It’s a very helpful tool for search engines because it tells them exactly where to find everything on your site. To make sure your sitemap works well with Google, follow these steps:
1) Create a new folder called “Sitemaps.”
2) Copy the URL of your homepage into the Sitemaps folder.
3) Open up Notepad (or any text editor), and paste the contents of the Sitemaps folder into the document.
Include a title tag for every page.
Make sure each page has its own title tag. This will help search engines understand what each page is about.
4) Add a description for every page.
5) Add a link to every page.
6) Save the file as.xml.
7) Upload the file to your server.
8) Check back regularly to see if your sitemap has been indexed by Google.
Sitemap Generator for WordPress
A free online tool to create a sitemap for your website. Generate a sitemap for any web page on your site using this free online tool.
Generate a sitemap from scratch or import an existing one.
This free online tool allows you to generate a sitemap for a website by entering its URL. It also lets you choose whether to use the XML format or HTML format. You can then add links to each page of your site and set up categories for them. Once you’re done, click “Generate” to see how your sitemap looks.
If you’ve ever wanted to make changes to your website’s structure, this tool will help you do so. Simply enter the URL of your site and select the type of sitemap you would like to create. Then, you can add pages, categories, tags and more.
Preview your sitemap before publishing it.
Once you’re done creating your sitemap, click “Publish” to save it. You can then preview your sitemap by clicking on the link at the top right corner of the screen. This will show you how your sitemap looks when viewed through Google Search Console.
Publish your sitemap.
If you’d rather not use an online tool, you can also manually create a sitemap using XML code. To do so, follow these steps:
1) Open up Notepad (or any text editor).
2) Paste the following into the document:
3) Save the file as sitemap.xml.
You can share your sitemap with other websites by uploading it to Google Webmaster Tools. This will allow them to see what pages you’ve included in your sitemap.
XML Sitemap Generator – How To Generate XML Sitemaps for Your Website
An XML sitemap is a file that lists all the pages on your website in order of importance. It helps search engines understand which pages are most important for visitors to see first. In this tutorial, we’ll show you how to generate an XML sitemap using our free XML sitemap generator.
Install the XML Sitemap Generator plugin.
If you’re looking to improve your site’s visibility with Google, then you need to make sure that your site has an XML sitemap. This will help Google index your entire site more effectively. You can use our free XML sitemaps generator to automatically generate one for you.
Create a new page or post with the XML sitemap generator widget.
Once you’ve added the widget to your website, click “Generate” to start creating your sitemap. It should take less than 5 minutes to complete.
Add your website’s URL as the base URL.
You will need to enter the URL of your site into the box above. This is where Googlebot will begin crawling your site. If you’re not sure what the URL of your site is, simply navigate to your site’s homepage and copy the address from there.
Select the type of sitemap (either RSS or Atom).
Once you’ve entered the URL, click “Generate” to start generating your sitemap. It should take less than a minute to complete.
Choose whether to include images or not.
You can choose to include images or not when creating your sitemap. If you do decide to include them, make sure you use the correct image format (jpg, png, gif).
Yoast SEO Sitemaps for WordPress
The Yoast SEO plugin for WordPress lets you add a sitemap to your site. This helps search engines crawl through all your pages in order to index them properly.In this article, we’ll show you how to create an XML sitemap using Yoast SEO.
We’ll also explain what it does, why you need one, and how to set up your own.
A sitemap is a file that lists out every URL (web address) on your website. It’s used by search engine crawlers to find new pages on your site. You can use a free online generator to create a sitemap for your site.
Why You Need One
If you’re not familiar with XML sitemaps, here’s what they do: They tell Google where each page on your site is located so that it can crawl them more efficiently. This helps Google index your entire site faster.
Creating Your First Sitemap
To create a sitemap, go to Settings > Writing > Create New Sitemap. You will see a screen similar to the one below. Enter the URL of your website (or any other pages you’d like to add) and click Save Changes.
Adding More Sitemaps
If you’re not familiar with XML sitemaps, here’s what they do. They allow search engines to crawl your site more efficiently by providing them with a list of URLs so they can index each page individually. This helps improve your rankings because Googlebot crawls your site faster. It also makes it easier for users to find your content.
Testing Your Sitemap
To test your sitemap, go to the Yoast SEO plugin settings page and click “Sitemap.” You should see a link at the top of the screen called “Test your sitemap” (see image below). Click that link and then enter a URL into the box provided. You will need to add the full URL of your website.
HTML sitemap advantages
Create a sitemap using Google Webmaster Tools.The HTML sitemap allows search engines to crawl through all pages on your site in an organized way. This helps improve indexing and makes it easier for users to navigate your website.
This will help search engines find your site more easily.
A sitemap is a file that lists out all the pages on your site. It’s used by search engine crawlers to make sure they can access every page on your site. You can use Google Webmaster Tools to generate one.
Create an XML file with links to each page on your website.
An XML file is a text document that contains links to webpages. This type of file is called a “sitemap” because it resembles a map. To create a sitemap, go to Google Webmaster Tools and click on Sitemaps. Then, select Add New Sitemap. Enter the URL of your website into the box labeled “URL” and then add any additional URLs you would like to list. Click Save when finished.
Upload this file to Google Webmaster Tools.
A sitemap helps search engine spiders crawl through your site and index its pages. If you use WordPress, there are plugins available that make creating a sitemap easier. You can also manually create one by copying and pasting the code below into an.xml file.
Add it to your web server.
Once you’ve added the code above to your website’s root directory (the place where all files are stored), you’ll need to add it to your web server so that it will appear when people visit your site. To do this, log into your web hosting account and navigate to the “Sites” section. Click on the name of your domain, then click on “Settings.” Scroll down until you see the option for “Add Sitemap,” and select the box next to “Yes.” Then click on “Save Changes.”
Submit your sitemap to Google.
You should submit your sitemap to search engines such as Google, Bing, and Yahoo! Search. This helps them index your pages more quickly, and also makes it easier for users to find your content. If you’re not sure how to submit your sitemap, check out our guide here.
Create an HTML Sitemap with Google Webmaster Tools
Once you have created your sitemap, submit it to Google using their Webmaster tools.To create a sitemap for your website, follow these steps: 1) Create a new folder in your root directory called “sitemap”. 2) Copy all of the pages on your site into this folder. 3) Open the file index.html in Notepad (or any other text editor). 4) Add the following code at the end of the page: 5) Save the file. 6) Upload the file to your web server. 7) Submit the sitemap to Google by going to http://www.google.com/webmasters/tools/submit-url.
This will allow Google to index your site more quickly.
If you’re not sure how to do this, check out our guide here.
Go to Google Webmaster Tools.
Click on ‘Sitemaps’ under the ‘Crawl’ tab.
Click “Sitemaps”.
You will need to enter your website URL into the box provided. Then click ‘Submit’.
Select “Create new XML file”.
This will open up a new window where you can select the type of sitemap you would like to create. Choose ‘Sitemaps’ then ‘HTML’.
Enter a name for the sitemap (e.g., “My Site Map”).
You can also add a description and set the priority level. If you do not enter any details, Google will use defaults.

